How to Use an AI Video Maker With Zero Editing Skills
· 11 min read
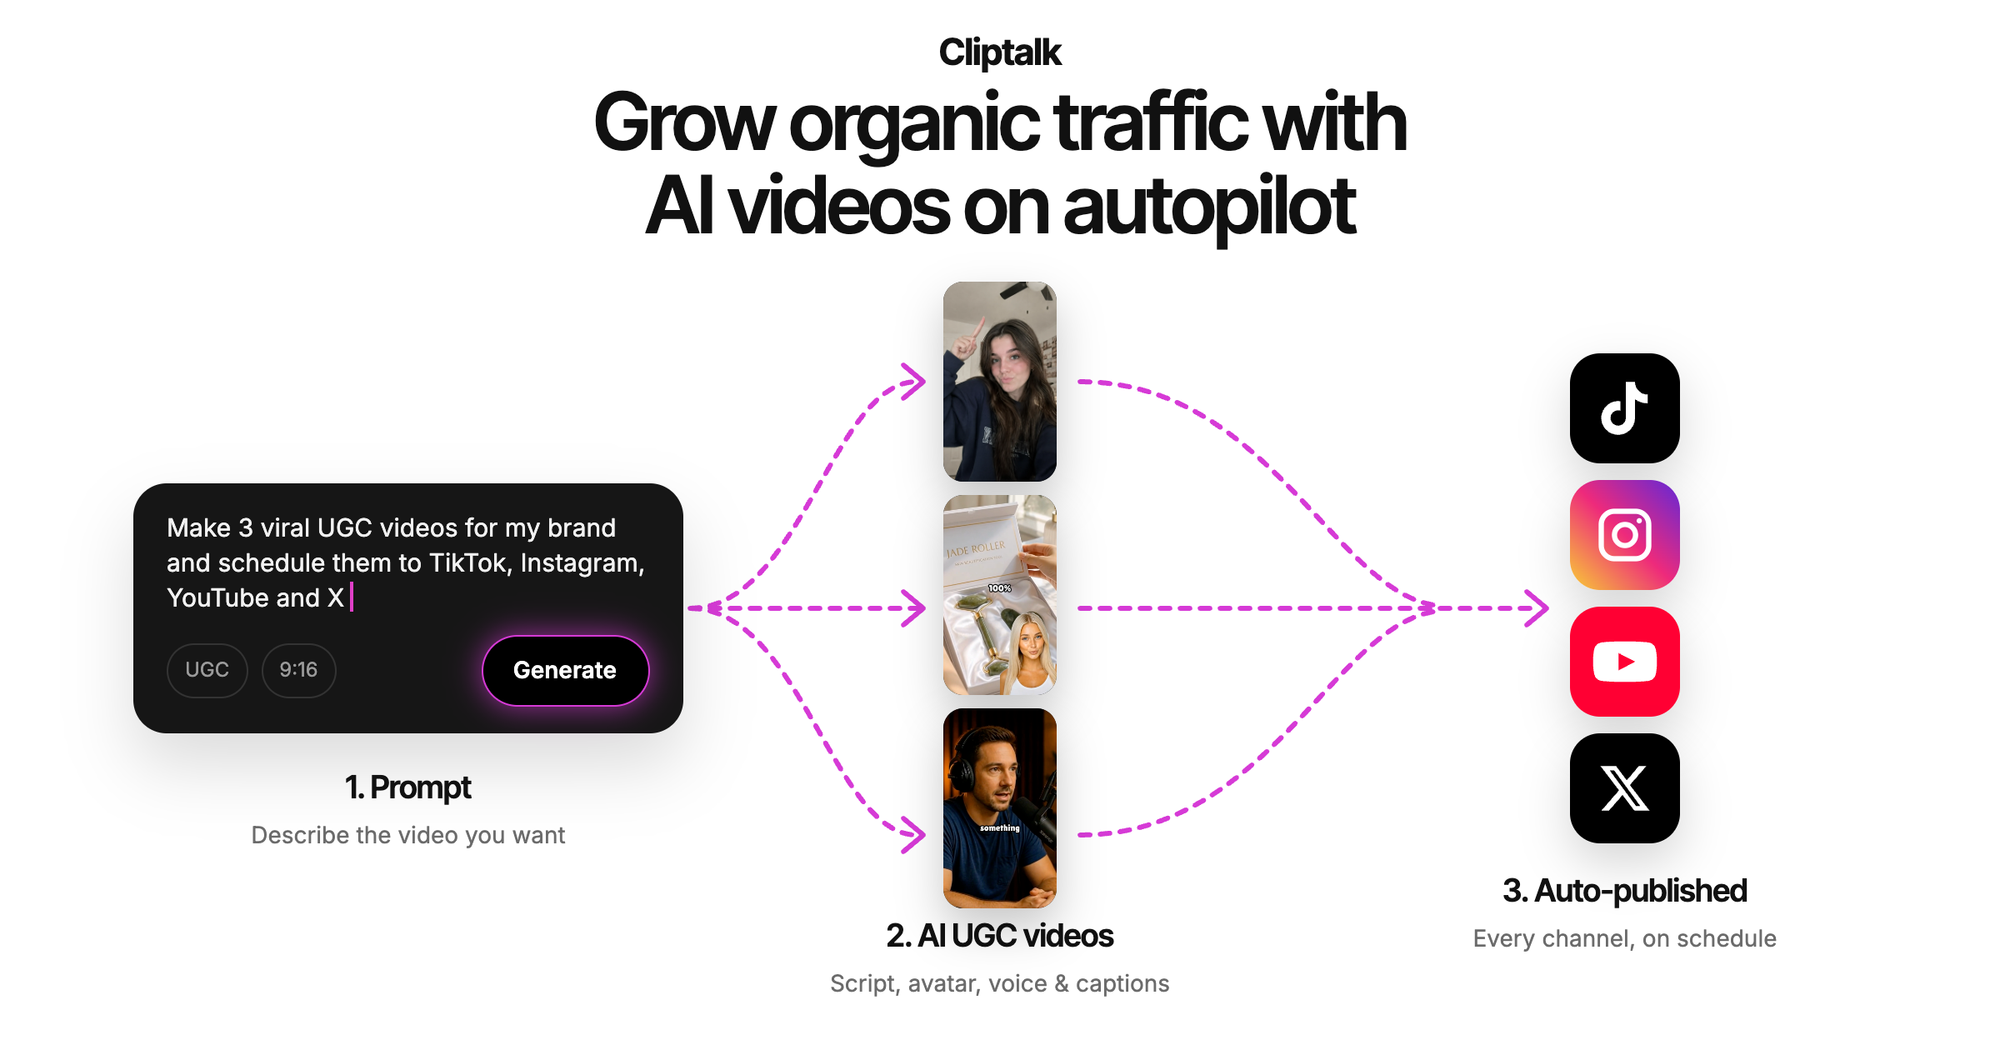
I get asked this constantly, usually by someone who has a good idea and a bad relationship with timelines: how do you actually use an AI video maker if you have never edited anything? The short answer is that you skip editing entirely and start with words. You type a prompt or paste a script, the tool writes or accepts the copy, picks visuals, generates a voiceover, burns in captions, and hands you a finished vertical video. I use Cliptalk for this because it goes all the way to a publish-ready 9:16 clip with narration, word-by-word captions, and B-roll in one pass, instead of handing me a five second clip I would then have to assemble somewhere else. That single difference, finished video versus raw footage, is the thing most beginners get wrong when they pick a tool.
Below is how I actually work, what the different categories of AI video tools really do, and the handful of small manual adjustments that separate a video that gets watched from one that gets scrolled past.
The category confusion that wastes most people's first week
Search "ai video maker" and you get two completely different products wearing the same label.
The first category is clip generators. Runway, Kling, Adobe Firefly, OpenArt, Magic Hour's text-to-video tool, and most of the Google results are in this bucket. You write a prompt describing a scene, and the model renders a short piece of footage. Kling 3.0 extends generation to around 15 seconds with 4K output and native audio, which is genuinely impressive, but 15 seconds is a shot, not a video. Some free tiers are tighter still: one popular text-to-video site caps free drafts at 5 seconds of 480p, and the average render takes roughly 200 seconds per clip. Do the math on a 45 second TikTok and you are looking at nine clips, thirty minutes of waiting, and then an editing job you specifically said you did not want.
The second category is end-to-end video makers. You give them an idea, a script, or an article, and they return a complete edited video: scenes in order, voiceover, captions, music, correct aspect ratio. Invideo, Kapwing's assistant workflow, and Cliptalk live here. This is the category you want if you have zero editing skills, because the output is the deliverable, not an ingredient.
There is nothing wrong with clip generators. I use them when I need one specific hero shot that nothing in a stock library can give me. But if your goal is "post three videos a week to Shorts," starting there is like buying flour when you wanted bread.
An honest comparison of the beginner-friendly options
Here is how I would rank the tools I have actually spent time in, judged only on one question: can someone with no editing experience get a finished, postable short-form video out of it today?
| Tool | What you get | Best for | Editing skill needed |
|---|---|---|---|
| Cliptalk | Finished 9:16 video with AI visuals, narration from 140+ voices, word-by-word captions, music | Faceless short-form on TikTok, Reels, Shorts | None |
| Invideo | Prompt to full video with script, stock visuals, voiceover in 50+ languages, subtitles; huge library of 16M+ stock photos and videos | Marketers who want stock footage over generated visuals | Low |
| Kapwing | AI assistant builds multi-scene videos from text, images, PDFs or articles, plus a real timeline editor underneath | People who want AI first but a manual editor as backup | Low to medium |
| Magic Hour | A suite of separate tools (text-to-video, image-to-video, lip sync, avatars) across frontier models | Experimenting with different models in one place | Medium |
| Runway | Generation plus precise editing on real footage, character references, extend and upscale | Creative and production work where quality beats speed | High |
| Kling / Firefly / OpenArt | Short, high-fidelity clips from prompts or images | Individual shots and visual experiments | High, you assemble elsewhere |
My honest read: if you are starting from zero and your target is short-form social, the top two rows are where you belong. Rows four through six will teach you a lot about AI video, and they will also eat your weekend.
Step 1: Write the script first, because the script is the video
The single biggest quality lever in an AI video is not the visuals. It is the first three seconds of copy. AI visuals are a commodity now. Attention is not.
When I start a video, I do not open a video tool. I open a text box and answer three questions:
- What is the hook? One sentence that creates a gap the viewer needs closed. "Most people lose money on this" beats "Today we're talking about savings accounts."
- What is the payoff? The specific thing they learn, feel, or find out. If you cannot name it, the video has no ending.
- How many beats get me there? For a 30 to 45 second short, five to eight sentences. That is it.
Then I let the tool draft it. Most end-to-end makers have a script generator built in, and several let you use it without signing up at all, which is a good way to test the writing quality before you commit to a platform. I never use the first draft as written. I rewrite the hook line myself, every time, and I cut any sentence that starts with "In this video" or "Let's dive in." The AI is a fast writer and a mediocre editor of its own work.
One practical rule I follow: aim for roughly 130 to 150 words per minute of finished video. AI voices read faster than you think, and scripts that feel short on the page usually land right on the timeline.
Step 2: Choose a format the tool can finish cleanly
Some video shapes are easy for AI to nail and some are not. After a few hundred renders I have a reliable mental list.
Formats that work with zero editing:
- Listicles. "5 things nobody tells you about X." Each item becomes a scene. The structure is built in, so the pacing is automatically good.
- Story videos. Narrative with a beginning, tension, and a turn. Horror, true crime style retellings, and short fiction perform extremely well because captions plus voiceover plus atmospheric visuals is exactly what these need.
- Explainers. One concept, one video, no tangents.
- Product showcases. Feature, benefit, proof, call to action.
Formats that fight you:
- Anything requiring a specific real person's face doing a specific real thing.
- Precise data walkthroughs where the on-screen visual must match a number exactly.
- Comedy that depends on timing between two characters.
Pick from the first list for your first ten videos. You are trying to learn the workflow, not win an award. I built my first batch entirely from listicles because I could see immediately which hooks worked and which did not, with the format held constant.
Step 3: Let the tool handle the four things you cannot do yet
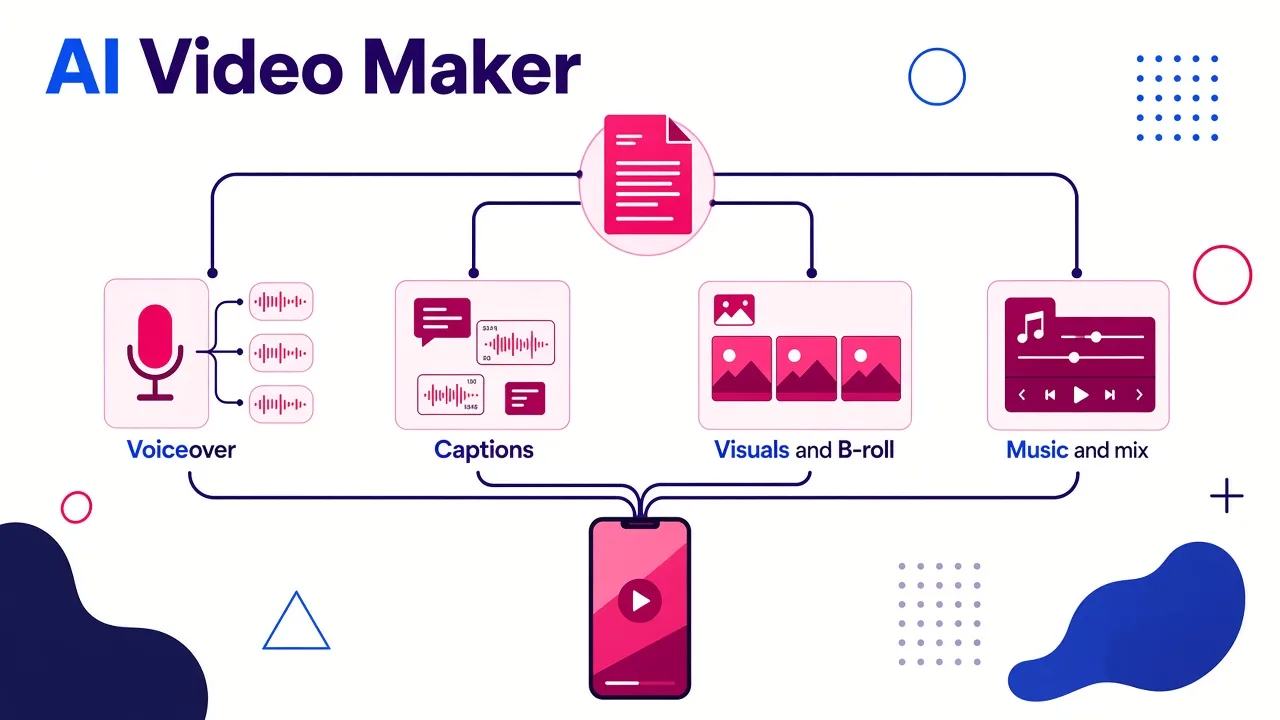
This is the part where zero editing skills stops being a limitation. A modern AI video maker does four jobs that used to take real software knowledge.
Voiceover. You pick a voice and the script becomes narration. The range matters more than the count, but a deep catalog helps: I work from a library of over 140 voices, and I keep a shortlist of three I trust for different moods. Warm and conversational for explainers, lower and slower for story content, brighter for product clips. Some platforms also let you clone your own voice, which is worth doing once you know you are committed, because a consistent voice is one of the few things that makes a faceless channel feel like a channel.
Captions. Word-by-word captions, where each word pops as it is spoken, are effectively mandatory on short-form now. Most viewing happens with sound off or in noisy environments, and the movement itself holds the eye. Do not use paragraph-style subtitles on a vertical video. Do not hand-time captions either, ever. The tool does it from the audio and gets it right.
Visuals and B-roll. The maker picks or generates a visual per scene based on your script. This is where the two categories diverge again: stock-library tools like Invideo draw from millions of real clips, while generated-visual tools build imagery to match. Generated visuals are better for anything fantastical or specific, stock is better for ordinary real-world footage like offices, traffic, or hands typing.
Music and mix. Background music at the right level under narration. If you are mixing this yourself in a timeline, you have already lost the time you were trying to save.
The reason I lean on one platform for all four is not loyalty, it is compounding. When script, voice, captions, visuals, and music come out of the same system, they are timed against each other from the start. When you stitch four tools together, you inherit four sync problems.
Step 4: The only three manual edits worth making
You will want to change things. Here is what is worth your time and what is not.
Worth it: the hook frame. Look at the first scene. If the visual does not support the first line of copy, swap it. This one change moves retention more than anything else you can do.
Worth it: any scene that is visually wrong. AI picks a literal match sometimes when a figurative one is better, or produces something slightly off. Regenerate that single scene. Good tools let you do this with a click or a short text instruction rather than a timeline operation. Invideo calls this editing with a prompt, and most modern makers have some version of it.
Worth it: pacing on the last scene. Endings run long. If the final beat sits there for three seconds after the last word, trim it. Short-form rewards ending on the last syllable.
Not worth it: everything else. Transition styles, font experiments, color grading, music swaps. I have A/B tested a lot of this and none of it moved numbers the way a better hook did. Spend the saved time making another video instead.
A realistic first session: twenty minutes, start to posted
Here is the exact sequence I would run if today were day one.
- Minutes 0 to 5. Pick a topic you already know something about. Write or generate a five to eight sentence script. Rewrite the first line yourself.
- Minutes 5 to 7. Paste it into the maker. Set format to vertical 9:16. Choose a voice. Choose a visual style and stay with it, because style consistency is what makes a feed look intentional.
- Minutes 7 to 12. Generate. Renders vary, but an end-to-end maker producing a 30 to 45 second captioned video typically lands in a few minutes, not the half hour a clip-by-clip workflow would cost.
- Minutes 12 to 16. Watch it once with sound off. Then once with sound on. Fix the hook frame if it is weak. Regenerate one bad scene if there is one.
- Minutes 16 to 18. Export. Check the captions are inside the safe zone and not hidden behind the platform's UI overlay at the bottom of the screen.
- Minutes 18 to 20. Post it. Write a caption that repeats the hook, not the conclusion.
The first one will not be great. The fourth one usually is. If you want a no-friction place to try this, the free script and video tools let you draft without signing up, which is how I would test any platform's writing quality before paying for anything.
The mistakes I see beginners make over and over
Treating the prompt like a search query. "Make a video about coffee" produces a video about nothing. Give the tool an angle, an audience, and a length. "45 second video for home baristas on why grind size matters more than bean price" gets you something usable.
Changing visual style every video. Your feed is a portfolio. Pick a look and run it for at least twenty videos.
Exporting horizontal by accident. Set the aspect ratio before you generate, not after. Reframing later is exactly the kind of editing work you are trying to avoid.
Publishing once and judging the tool. One video tells you nothing. The whole argument for using an AI video maker is volume with a quality floor, and volume takes a couple of weeks to read. I wrote more about whether the output actually holds up at daily cadence in this piece on posting AI video every day.
Ignoring the sound-off pass. Most of your audience will watch it muted first. If the video does not make sense from captions and visuals alone, it is not finished.
Why this works now when it did not two years ago
A few things changed at once. Rendering costs collapsed, so tools that used to charge agency prices now sit under twenty dollars a month. Voice synthesis crossed the threshold where a listener stops noticing. Caption timing became automatic and accurate. And the platforms themselves got hungrier for volume, which rewards anyone who can publish consistently.
The demand side moved too. Wyzowl's research has 87% of buyers saying video convinced them to make a purchase, an all-time high. That is not a reason to make bad video. It is a reason to stop letting "I can't edit" be the thing that keeps you from making any.
What to do next
Pick one format from the list above. Write eight sentences. Run them through an end-to-end maker and post the result. Do that five times before you change anything about your process.
If you are aiming at TikTok specifically, starting from a purpose-built TikTok video maker saves you the aspect ratio and caption-placement mistakes that cost most people their first week. Everything else you need, you will learn faster by publishing than by reading.
The skill you are actually building here is not editing. It is writing hooks and judging pacing. The software handles the rest, and it will keep getting better at it. Your job is to have something worth saying and to say it in the first three seconds.
Tags: ai video maker, short-form video, video creation, ai tools, content creation, faceless channels