How to Make a Faceless YouTube Video From Your Script With AI
· 14 min read
To make a faceless YouTube video from your script, you tighten the script for spoken delivery, split it into scenes, give it an AI voiceover, match each line with B-roll or an AI character, add captions, and export in the right format for Shorts or long-form. The fastest way I've found to do all of that in one place is Cliptalk: it takes the script you paste in and returns a fully edited video with the voiceover, captions, and B-roll already timed to your words. You start by reviewing a draft instead of building a timeline from scratch. Below is the full workflow I use, the decisions that matter at each step, and where other tools fit if your channel needs something different.
What "faceless" actually means for a script-driven video
A faceless video is one where nobody films themselves. The script carries the entire video, so the visuals and voice have to do the work a presenter normally does. In practice, faceless videos on YouTube fall into a few formats:
- Narrated B-roll. A voiceover reads the script while footage, images, or generated clips illustrate each line. This is the most common format for explainers, listicles, history, finance, and story channels.
- AI character videos. A generated character appears on screen and delivers lines or acts out the story. This works well for storytelling, skits, and recurring series.
- Text-led videos. Captions and on-screen text do most of the talking, often over music or a quiet voiceover. These are popular for quotes, facts, and quick tips.
- Avatar presenter videos. A realistic AI presenter reads your script on camera. Technically there is still a face, just not yours, so these suit training and corporate content more than typical faceless channels.
Your script determines which one you need. A script full of concrete nouns ("the bridge collapsed at 3 a.m.") is natural for B-roll. A script built on dialogue or a recurring persona wants characters. Decide this before you generate anything, because it changes how you prepare the script.
Step 1: Write the script for the ear, not the page
Most script-to-video problems start before the tool ever sees the text. A paragraph that reads fine in a blog post often sounds dense and breathless when an AI voice reads it aloud. Before I paste anything into a generator, I run every script through these checks:
- Read it out loud with a timer. If you stumble, the AI voice will sound unnatural in the same spot. Rewrite any sentence you can't say in one breath.
- Put the hook in the first line. On Shorts especially, viewers decide in the first moments whether to keep watching. Open with the most surprising claim, question, or result, not with "Hey guys, today we're going to talk about..."
- One idea per sentence. Each sentence will likely become one scene. If a sentence asks the viewer to picture two unrelated things, split it.
- Write visible things. "The economy struggled" gives the visuals nothing to show. "Shop windows went dark across the high street" does. Concrete language produces better B-roll from every tool I've tested.
- End with a clear call to action. Tell the viewer exactly what to do next: subscribe for part two, check the next video, or comment an answer.
If you're starting from an idea rather than a finished draft, the free AI YouTube script generator writes the full spoken script word for word, from hook to CTA, and gives you title options at the same time. It needs no signup, and you can render the script straight into a finished video once you're happy with it. I still edit every generated script by hand. The tool gets me past the blank page, and my edits make the channel sound like itself.
Step 2: Break the script into scenes before you generate
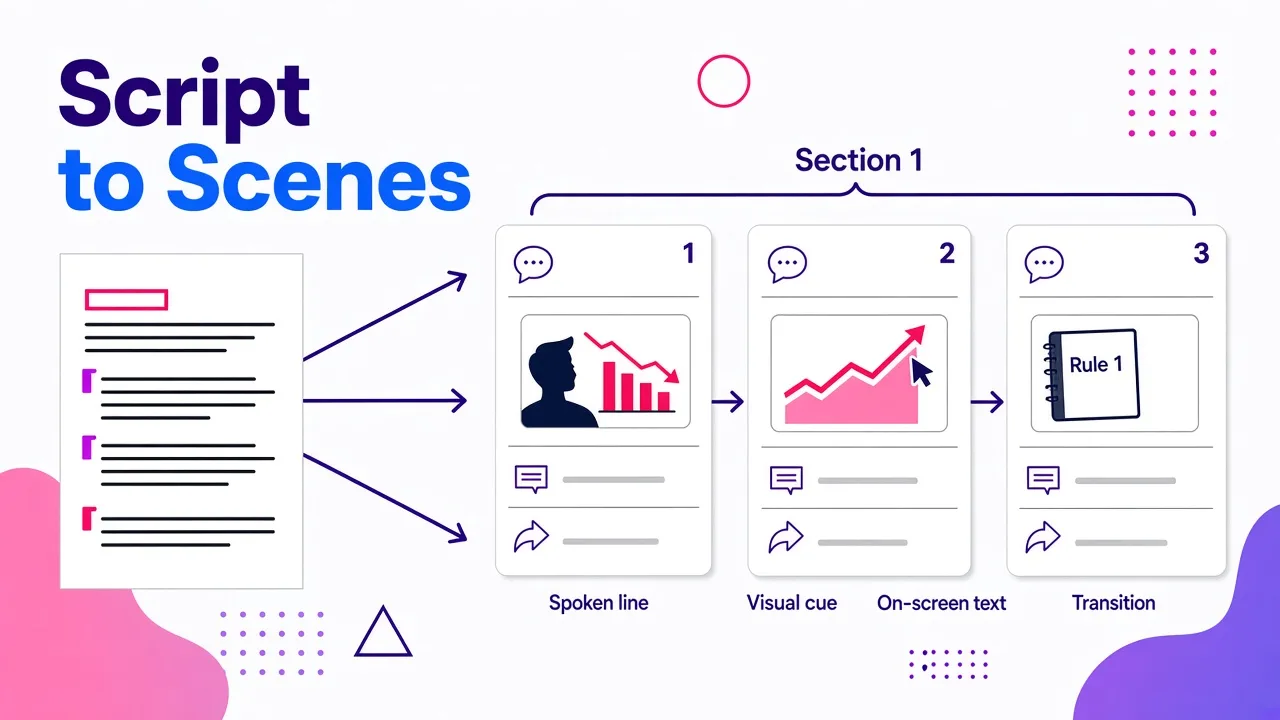
This is the step most people skip, and it's the one that saves the most time later. Before generating, I mark every point where the idea, location, speaker, or action changes. Each change is a possible scene boundary.
For each scene, I note four things:
| Field | What to write down | The question to ask |
|---|---|---|
| Spoken line | The exact narration for this beat | Can it be heard clearly without rushing? |
| Visual cue | The subject, setting, or action on screen | Does the visual prove or clarify the line? |
| On-screen text | A short number, term, or takeaway | Can it be read in the time the scene is visible? |
| Transition | Why the next scene follows this one | Does the cut move the story forward? |
Here's what a short first pass looks like for a finance explainer:
- Scene 1: "Most people lose money on their first investment for one boring reason." Visual: a person staring at a red stock chart. On-screen text: "One boring reason."
- Scene 2: "They buy after the price has already jumped." Visual: a chart rising sharply, then a cursor clicking "buy" at the peak.
- Scene 3: "Here's the rule that fixes it." Visual: a notebook with a single written rule. On-screen text: "The fix."
You don't need to paste these cards into the generator. They're your control layer. When the draft comes back, you compare each scene against its card and spot weak visuals in seconds instead of rewatching the whole video wondering what feels off.
For longer scripts, group the cards into sections (intro, each main point, outro). A ten-minute script might have dozens of beats, and reviewing them in sections keeps you from losing track.
Step 3: Pick a voice that will carry the whole video
On a faceless channel, the voice is your identity. Viewers who stick around for a month are listening to the same voice every upload, so treat this as a branding decision, not a quick dropdown pick.
What I look for when choosing an AI voiceover:
- Fit with the topic. A calm, lower voice suits history and documentary content. A faster, brighter voice suits tips, facts, and listicles. Horror and mystery channels need restraint, not enthusiasm.
- Natural pauses. Good voices handle commas and full stops like a person would. If the voice rushes through punctuation, add line breaks or shorter sentences to your script.
- Pronunciation of your niche's vocabulary. Test the voice on the names, brands, and technical terms your channel uses most. Fix problems by spelling words phonetically in the script.
- Consistency across uploads. Pick one voice and stick with it. Switching voices every few videos confuses returning viewers.
If you want the channel to sound like you without recording every episode, voice cloning lets you record a sample once and generate narration in your own voice afterward. I've written up which AI voice generators sound most human for voiceovers if you want to compare options before committing.
Step 4: Decide how the visuals get made
This is where tools differ most, and where the choice has the biggest effect on how your channel looks next to everyone else's. There are three main approaches:
| Approach | How it works | Strengths | Weaknesses |
|---|---|---|---|
| Stock footage matching | The tool reads each line and pulls licensed stock clips that match keywords | Fast, realistic, works well for real places and industries | The same clips show up on many other channels using the same libraries; nothing exists for scenes nobody ever filmed |
| AI-generated B-roll | The tool creates new visuals for each scene from your script | Original visuals, can show anything you can describe | Needs concrete script language to get good results; review every scene |
| AI characters | A generated character appears and performs or narrates | Builds a recognizable persona and recurring cast | Best for story and personality-driven formats rather than dry explainers |
The weakness of stock footage deserves more attention than it gets. When hundreds of channels pull from the same library, viewers start recognizing the same handshake, the same city skyline, the same person typing on a laptop. Your video can be well written and still look generic in the first three seconds.
Raw generative video models have the opposite problem. They produce striking footage, but in short clips. Some top out around 8 seconds per generation, others around 15, which means a 10-minute video built from 8-second clips is roughly 75 separate generations you stitch together yourself, plus narration recorded separately. That's fine for a cinematic trailer and painful for a weekly upload schedule.
For most faceless channels, the sweet spot is a tool that handles the whole pipeline: it reads the script, generates or selects visuals per scene, voices the narration, captions it, and edits the result into one timeline you can adjust.
Step 5: Generate the video from your script
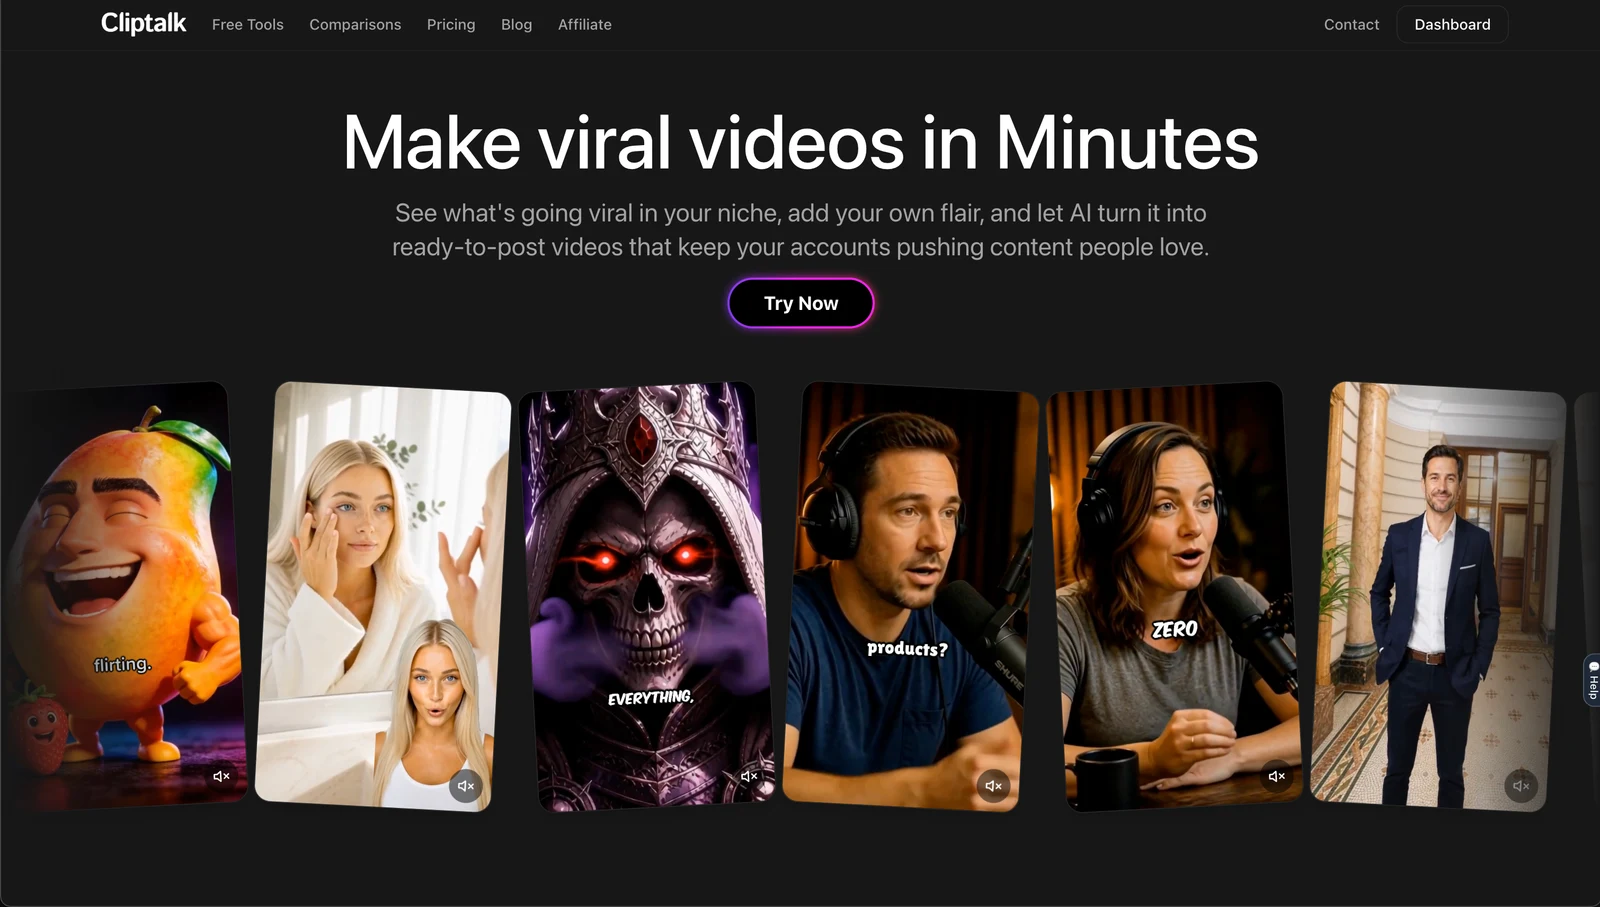
Here's my actual workflow for a Short from a finished script. I use Cliptalk for this because the script stays the script: my wording goes in, and the voiceover reads it back as written instead of paraphrasing it into something I didn't approve. That matters more than people expect. Many tools quietly rewrite your text "for flow," and you only notice when a key line has lost its punch. I explain why this matters in more detail in script to video AI that keeps your original wording.
The steps:
- Paste the prepared script. Use the version you've already read aloud and trimmed, not the first draft.
- Choose the format. Vertical for YouTube Shorts (the same file works for TikTok and Instagram Reels), so one script can feed three platforms.
- Pick the voice. Use your channel voice or your cloned voice. Keep it the same as previous uploads.
- Choose visuals. AI B-roll for explainers and lists, AI characters for stories and recurring personas.
- Generate. The tool splits the script into scenes, matches visuals to each line, adds the voiceover and captions, and auto-edits the pacing.
- Review against your scene cards. Go scene by scene. Is the visual doing its job for that line? If not, swap it.
The first draft is rarely the final video, but it should be close. If it's far off, the problem is almost always the script: vague lines produce vague visuals. Rewrite the weak line, regenerate that scene, and move on.
Step 6: Edit captions, pacing, and B-roll
Generation gets you a draft. Editing gets you a video people finish watching. These are the edits I make on nearly every faceless video:
Captions. Most people watch Shorts with the sound off at first, so captions are the hook for silent viewers. I keep them large, centered in the safe zone (away from the bottom where YouTube's interface sits), and limited to a few words at a time. Animated word-by-word captions hold attention better than static subtitle blocks. If you want to go deeper on styles, see the guide on adding animated subtitles with an auto caption generator on our blog.
Pacing. Cut any visual that sits on screen too long without a new line or text. Faceless videos lose viewers in the gaps. If a scene feels slow, shorten the line in the script rather than speeding up the voice, because sped-up AI voices sound strained.
B-roll swaps. Replace any visual that's generic, off-topic, or confusing. The first and last scenes deserve the most attention: the first keeps people watching, and the last sets up the next video.
Emphasis. Add on-screen text for numbers, names, and the one takeaway per section. Viewers remember what they see and hear at the same time.
Music. Keep background music low enough that every word of the narration is clear. If you have to strain to hear the voice on phone speakers, the music is too loud.
Step 7: Export, title, and upload
Before uploading, I check three things:
- Format. Vertical for Shorts, horizontal for regular long-form uploads. Don't upload a vertical video as long-form and expect it to perform like a horizontal one; the viewing experience is very different.
- Title and thumbnail text. The title should promise exactly what the hook delivers. If you generated your script with title options, test the strongest two against each other across uploads and keep notes on which style wins.
- First frame. For Shorts, the first frame is effectively your thumbnail in the feed. Make sure it shows something interesting with readable text, not a black frame or a fade-in.
Then repurpose. A vertical Short made from your script can go to TikTok and Instagram Reels the same day with no extra editing, which turns one script into three uploads.
Which tool fits which faceless video
I've used several script-to-video tools across different channel types. Here's how they compare for faceless YouTube work specifically, based on what each is built to do:
| Tool | Best for | How it handles your script | Starting price |
|---|---|---|---|
| Cliptalk | Faceless Shorts, Reels, and TikToks with AI B-roll, AI characters, voiceovers, and auto-captions | Turns the script into a fully edited video; keeps your wording | Free script generator; see site for video plans |
| Pictory | Long scripts and articles turned into stock-footage videos | Splits the script into scenes and matches licensed stock | $25/mo billed yearly ($29 monthly) |
| InVideo AI | Mixing stock footage with AI-generated shots via an AI agent | An agent scripts, sources, and edits from your instructions | $9/seat/mo billed yearly |
| Kapwing | Approving a storyboard shot by shot before spending credits | Converts the script into an editable storyboard first | $16/mo billed yearly ($24 monthly) |
| HeyGen | Videos where an AI avatar presents your script on camera | An avatar reads the script as a talking head | $24/mo billed yearly ($29 monthly) |
How I'd choose:
- You run a faceless Shorts channel and post often: go with the tool that turns a script into a finished, captioned, voiced video in one pass, with original B-roll and characters, so your feed doesn't look like everyone else's stock montage. That's the first row.
- You turn long blog posts or documents into horizontal videos about real places or industries: Pictory's stock-matching approach fits, as long as you accept that stock clips repeat across channels.
- You want an agent to handle sourcing and editing for you: InVideo AI's mix of stock and generated footage works if you're comfortable steering it with instructions.
- You want to sign off on every shot before paying for it: Kapwing's storyboard-first workflow is built for that.
- You actually want a presenter on screen: HeyGen, though at that point it's an avatar channel rather than a truly faceless one.
Mistakes that keep faceless videos from performing
After producing a lot of these, the same problems show up again and again:
Generic scripts. If your script could have been written by anyone about anything, the video will feel that way too. Add specific examples, numbers you've verified, and an opinion. AI tools can produce the video, but the angle has to come from you.
Wall-to-wall stock footage. Viewers notice recycled clips, and so does the algorithm when watch time drops. Use original or generated visuals for at least the hook and key moments.
A different voice every week. Consistency builds recognition. Pick a voice and keep it.
No hook. A slow intro kills Shorts. Cut every word before the first interesting one.
Skipping the review. Auto-editing is a draft, not a final cut. Spend a few minutes checking every scene against your cards. That review is the difference between "obviously AI" and "good video."
Reusing content without transforming it. YouTube's monetization rules reward original, transformative work. A script you wrote, with your own angle and structure, plus visuals made for it, is on much safer ground than repackaged clips with a voice slapped on top.
A quick checklist for every faceless video
Before you hit publish, run through this:
- Script read aloud, timed, and trimmed
- Hook in the first line, CTA in the last
- Script split into scenes with a visual cue for each line
- Channel voice (or cloned voice) selected and unchanged from previous uploads
- Visuals checked scene by scene, with weak ones swapped
- Captions readable, animated, and inside the safe zone
- Music low enough to hear every word on a phone
- Correct format: vertical for Shorts, horizontal for long-form
- Title matches the hook's promise
- Vertical version shared to TikTok and Reels too
Frequently asked questions
Can I make a faceless YouTube video from a script without any editing skills? Yes. Script-to-video tools handle scene splitting, voiceover, captions, and B-roll automatically. You still need judgment to review the draft, but you don't need to know how to use a timeline editor to get a publishable video.
Will the AI change my script? It depends on the tool. Some rewrite your text into their own narration, and others keep your wording exactly. If your channel relies on specific phrasing, jokes, or facts, use a tool that preserves the script as written and check the voiceover against your text.
Should I use stock footage or AI-generated B-roll? Stock footage is fast and realistic but repeats across channels that use the same libraries. AI-generated B-roll gives you original visuals for any scene you can describe. For a channel trying to stand out, generated visuals for the hook and key moments usually pay off.
Can one script become videos for TikTok and Instagram too? Yes. A vertical Short made from your script works on TikTok and Instagram Reels without re-editing, so one script can produce three uploads.
Do I need to record my own voice? No. AI voiceovers cover most channels well. If you want the channel to sound like you without recording each episode, voice cloning lets you record once and generate narration in your own voice from then on.
The workflow comes down to this: write for the ear, plan your scenes, lock in a voice, let a tool build the first draft, and spend your time on the review instead of the assembly. That's how I keep a faceless channel posting consistently, and it's why I build my Shorts in Cliptalk. The script stays mine, and the hours I used to spend editing go into writing better scripts.
Tags: faceless youtube, script to video, ai voiceover, youtube shorts, video editing workflow